Leather: scuffed and sexy Sunday, Apr 3 2011 

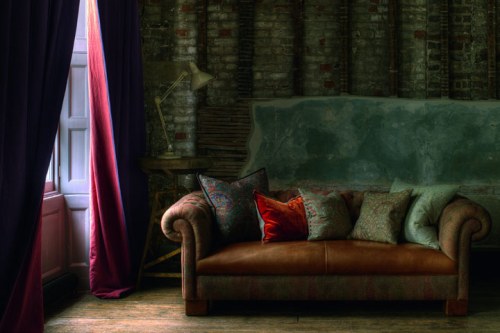
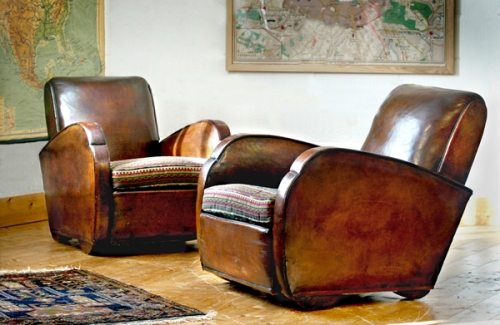
Just as biker jackets are enjoying enormous popularity in fashion, so leather is returning to interiors.  And just as the jackets are masculine, scuffed and cool, so leather for interiors is masculine, scuffed and cool.  Smooth black and white leather is going to look dated very soon.

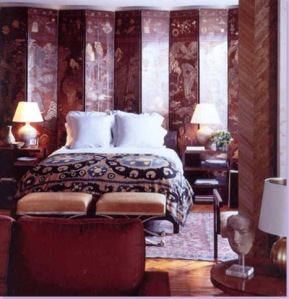
The leather look that is going to be around for a while is largely brown, and very worn.  Leather looks better as you use it – the patina of use is what makes biker jackets cool.  And it’s the same deal for furniture.

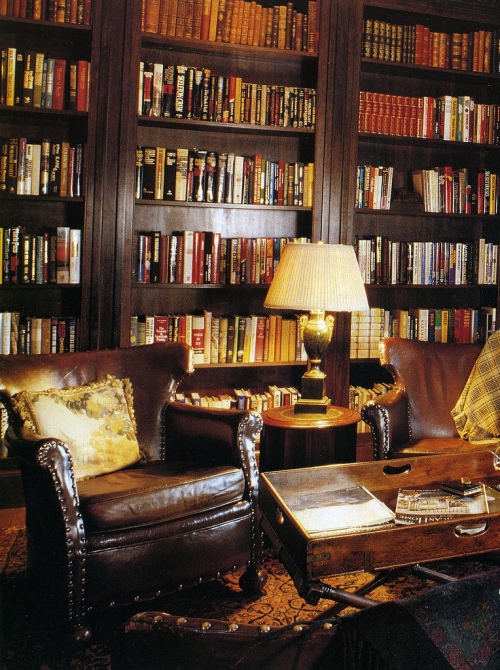
Think club chairs in a gentleman’s study.  Imagine the worn leather of an explorer’s tent.

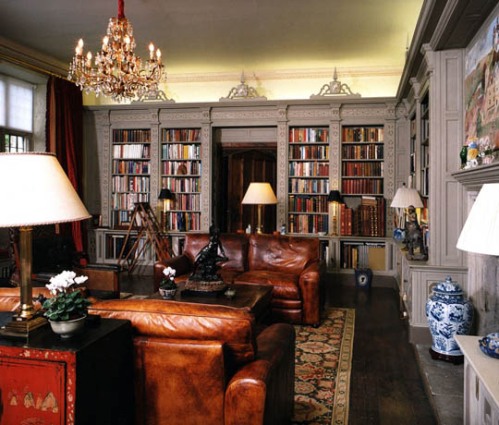
And then pair the leather either with the details associated with smoking lounges, clubs and adventure: leather bounds books, specimens, fossils and interesting finds, maps.  Add some tartan, paisley or flannel and you’ll have a fabulously atmospheric room.

Alternatively, the addition of worn leather to a clean and modern room will immediately add warmth and personality.  It can take the edge off overly feminine rooms, and balance out chintz and frills.

If your seat is genuinely old, and the seat has worn through (old leather can sometimes crack – keep it moist in the same way you do your shoes with a regular polish with oils or wax) – you don’t have to pay a fortune for a new one.  You can recover the cushion in a contrasting fabric – as seen in the photos above.

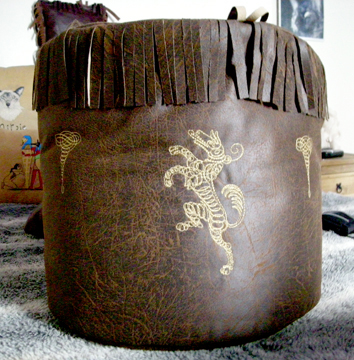
You can find leather armchairs and sofas.  There are also desks and tables covered in leather, or, for a smaller accent, cushions.

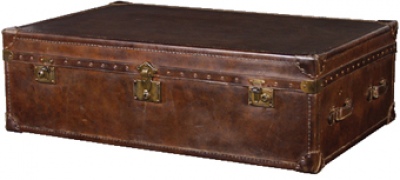
Old leather trunks, complete with studs and straps look very handsome in any room.

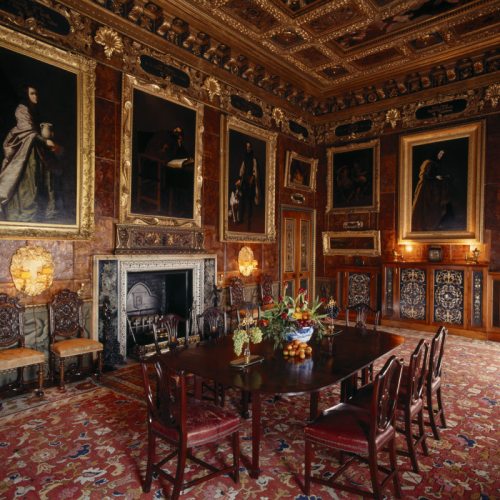
And if you’re going all out – cover the walls in leather.  The room below, at Kingston Lacy, is covered in Spanish leather, embossed with gold.  This room was created hundreds of years ago, by a chap who was later exiled from England for various crimes.  Reading between the lines it becomes abundantly apparent that he was gay.

Of course!  Who else could have created a room like that?

Look for pieces like the one below – seen at an auction.  For tips on how to bid to win – check out this link.

How to buy furniture at auction Friday, Mar 25 2011 

Auctions are a fun and very cheap way to buy furniture.  But they can be daunting to a newcomer.  So here are some tips that I wish I’d known!

1. The prices are a guide

Things can go for a lot more (or a lot less).

So you may discount something that has an estimate of $3000, and then no-one bids $100.  Or you may set your heart on an item with a low estimate.  The ‘bird cage’ below had an estimate of $25.  I determined to have it (I had visions of it as a fabulous light above a table), and was prepared to pay $300.  It went for $650.

In another auction, when we lost out on a pair of antique french chairs that went more than five times the estimate of $600, a pair of baronial chairs, with a many thousand dollar estimate wasn’t bid on at all.  In a rash moment, the man stuck his hand up and we got them for $100.  The look of horror on his face when he realised that we had them was priceless.  We hadn’t even examined them!

However – they are glorious now: check out the story of their transformation here.

2. Buy what you want and need (not what is going for a song)

Linked to my advice above – it is very easy to get carried away with items that are unbelievably reasonable. You may well end up with two dining sets, four sofas and a bed.  What are you going to do with them?

These are the things I ask myself.  I try to ask them BEFORE I’ve purchased.

3. Research your item so you know if it’s a good price

Don’t get so carried away that you pay more than retail price at an auction.  It pays (literally) to know what things are selling for in the shops.

Generally, it horrifies me that an antique mahogany dining set (table and chairs) costs less than an IKEA pine equivalent.  Mahogany just isn’t fashionable at the moment.

But check to be certain – it also gives you something by which to set your upper price limit.

4. Auction fees

Once you know how much you’re prepared to pay, don’t forget to factor in the auctioneer’s fee.  These vary from 15% to 20% and higher.

If you’re prepared to pay $600 for something.  Does that include the additional fee?  Because if you bid $600, you may end up paying $720 when it includes the fee. 

5. Different styles and ways of bidding

The best way to bid is in person at the auction.  You can see the other people bidding, catch the mood, see how serious others are and when they hesitate.  Sometimes you can tell when one more bid on your part will clinch it, and when the other party is prepared to pay whatever it takes.

You can usually also leave absentee bids, where you leave you maximum on a form and the auctioneer bids on your behalf.  If you really want an item, you risk losing it. 

Finally, you can often bid by telephone (some auction houses have rules about minimum bids if you do this).  Which means that you can bid even while at a friend’s party.  Dangerous if you have a drink in hand…

In terms of bidding strategy, you can either wait and see what others do, gauge the level of interest and then bid towards the end.  Or you can bid so firmly and strongly from the start that you put others off with your determination.  You won’t fool the seasoned players, but you might fool novices. 

6. Getting it home

If you are buying large items, you usually have to take them very quickly – usually within 24 hours.  So be prepared to organised trucks or removalists at short notice and at inconvenient times.  Remember to factor these costs into the true cost of buying the item.

7. If it’s not what you want after all?

Finally – if you get it home and you realise that it really isn’t what you hoped it would be?  Don’t just live with it.  Either sell it at the following auction (where you bought it).  You may lose the auctioneer’s fee, but you shouldn’t be too much out-of-pocket. 

Or, sell it on Ebay.  Sometimes, I’ve made a substantial profit doing this.

And there of course, lies a business opportunity.  But that’s another story…

Please can you vote on what I should do with this table? Sunday, Dec 19 2010 

This is one project I want to finish off over the holidays.  I’m toying with a couple of options – and your opinion would be appreciated.

I started off with this:

coffee table before recycling

I wanted a large, low coffee table.  (Ideally, a coffee table should be lower than the height of the seat.)  I really don’t like the marmalade varnish that is often used on pine.  Pine is such a lovely colour until it is turned orange.

It’s like a really bad fake tan.

sanded prepped pine coffee table before

I sanded it back hard, to really rough up the varnish.  And then I primed it:

Primed white coffee table wood

And then while I thought about it, I put a matt white first coat of paint on, to even it all up and provide a base for the next step:

Primed painted white coffee table wood

The only problem is, I can’t quite decide what the next step is!

These are the kinds of ideas that I was considering.  I’m into flags at the moment, as you’ll know from this box I did earlier….

So I was considering a flag on the table, but in monochrome creams and greys.  I was actually wondering about the US flag this time though.

The one above is subtle, but might look nice?

Or maybe an off-set flag?

And then I wondered if that would be all too much, and that just a distressed effect might be better

So I actually haven’t done anything at all!

Please can you vote – and I’ll follow your advice.  The finished project to be seen in early January.

An antique screen before and after Wednesday, Nov 17 2010 

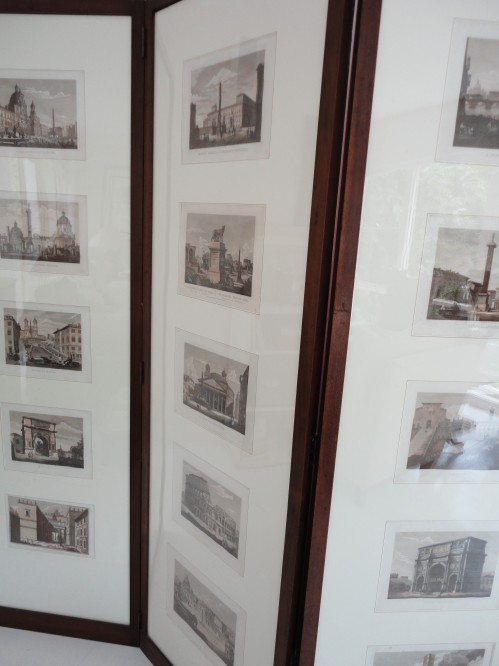
I just fell in love with this antique screen.  Each panel has five engravings of Rome, exquisitely mounted and framed.  It’s so chic and elegant.  And although screens are usually considered slightly feminine (so that one can throw one’s lacy underwear over it as one disrobes discreetly behind) – this one is delightfully masculine.

Recycled antique screen prints Italian

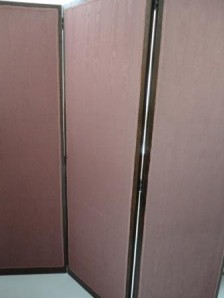
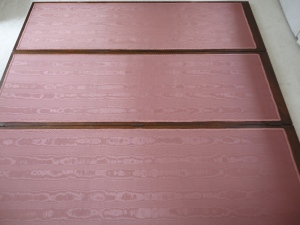
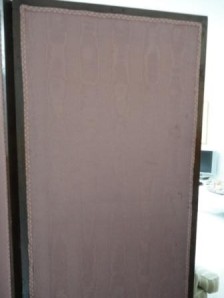
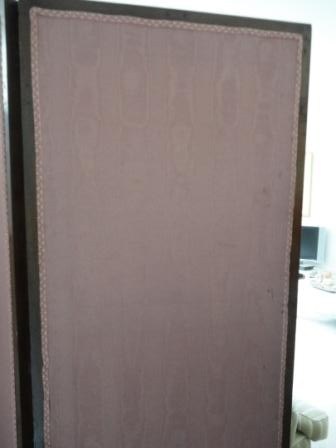
Its reverse however, was a different story.  Unlike people, where having two faces is never considered attractive, part of a screen’s beauty lies in its ability to have two different sides.  Ideally these should both be gorgeous – mildewed pink taffeta wasn’t what I had in mind.

Antique Pink screen before recycling

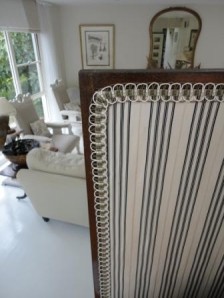
This is really easy to fix on a screen.  Firstly, lay it down and rip off the binding that is concealing the edge and its construction.


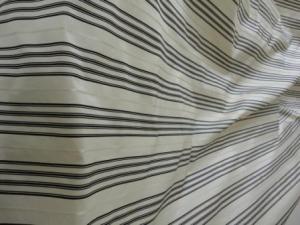
In this instance, each panel could be removed from the back.  Then you need to select your fabric.  I’m using some fabric I have left over from these chairs.

I like the way the colours match the front, and the way it is also a fairly masculine strong stripe – I think it links well with the other side.

Silk taffeta fabric for recovering reupholstering furniture

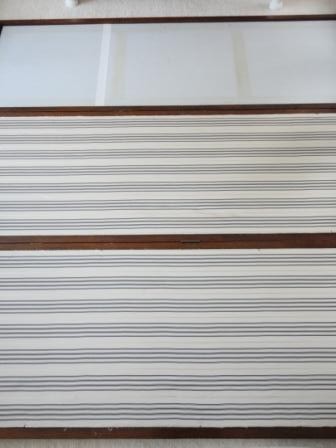
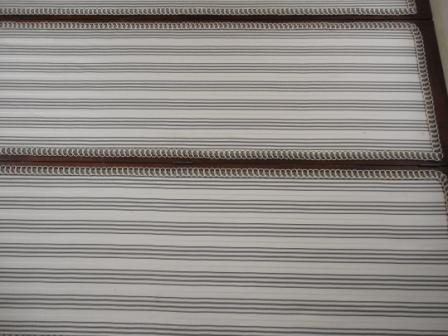
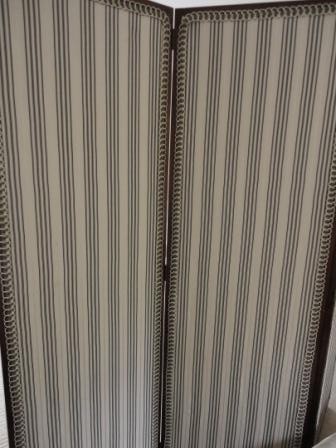
reupholstered screen vintage silk

As the silk was quite crushed, I ironed it first (you can’t do this after you have attached it!).  Cut each piece to overlap each panel and then staple it round the back, pulling it as tight as you can, but ensuring (in this case) that you don’t pull unevenly and make the stripes go wiggly.  Above you can see two of the three panels covered.

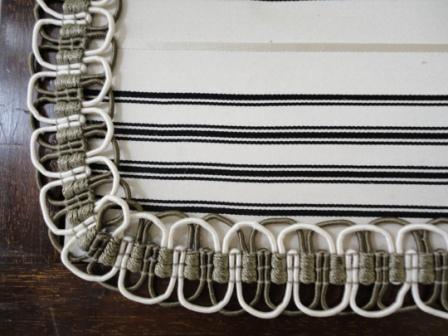
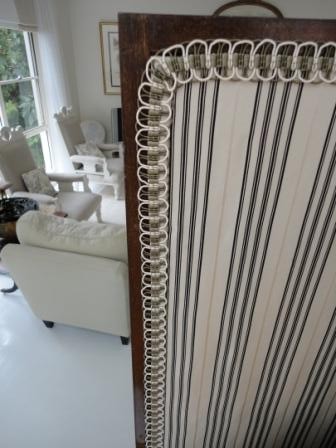
trim on silk reupholstered screen

Then glue on trim to hide the join.  If you stapled fabric straight on the back – then the trim should hide this too.

recovered antique screen doesn't cost the earth

Make sure you press the trim down as the glue is drying, especially when you’re going round corners.

recovered screen after

Often you can see the rear view of furniture in a room.  It really pays to make sure that it looks good from every angle.

silk screen reupholstered recycled

Just a reminder of the mildewed silk before:

mildewed silk screen before recycling

Doesn’t it look better now?

recycled furniture silk screen after

Why a screen is a fabulous investment Monday, Nov 15 2010 

screen behind bed

Folding screens were very popular last century – they kept out drafts, hid doors that servants used, provided a discreet area for ladies to disrobe….  And they were often beautiful works of art.

Nowadays, we have other methods for keeping out drafts, few of us have servants (although there are days when I could really use one!), and most of us aren’t so shy about getting our kit off…. so what would you do with a screen?

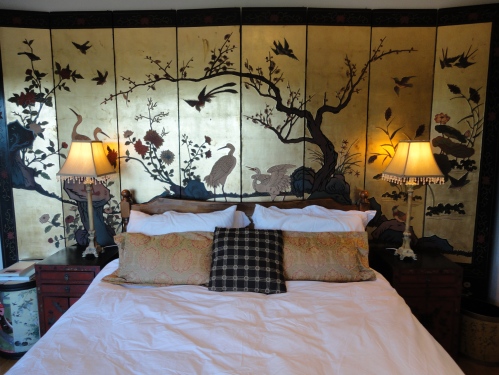
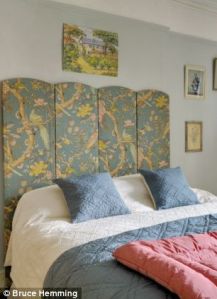
Screens are a stunning way of framing a bed.  We’ve had discussions on using large artwork above a bed here – and a screen does it all for you….  You can get them covered in a fabric which tones with your bedroom colours.  Or you can go all out, such as the gold screen I used above – which injects real glamour into the boudoir!

You can actually make a screen very easily – just cut plywood to size, and cover each panel with batting and then fabric, and hinge them together.  On Wednesday I’ll show you how to recover a screen from scratch.

Screen on wall

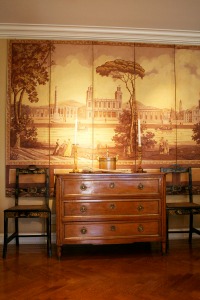
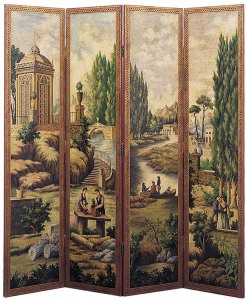
Screen can be hung on the wall like art – but because they are large, they can fill some of the featureless and huge walls that some houses have.  They can imbue a room with such a different character, depending on their look.  I love the antique depiction of a river and a city above.

Screen behind sofa

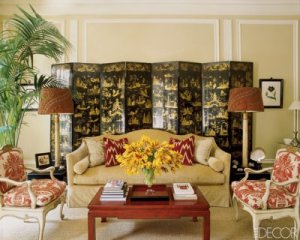
Screens are also great ways of framing a sofa or couch.  It feels cosy to sit in front of one, and the seating arrangement looks much more inviting.  You can use it to add a sense of grandeur, depending on the style of the screen.

Some can act as room dividers in today’s open plan living – giving you a flexible way of changing your room around. 

And because they fold up, you can always pop them up against a wall when you don’t need them.

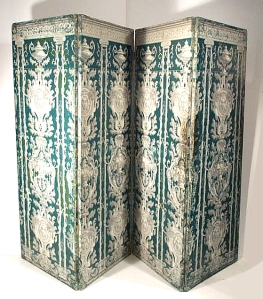
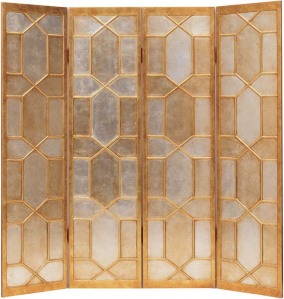
They come in every conceivable look – from antique wall-papered examples, to the art-deco gold and silver one above.  Oriental screens are usually covered in gold or silver leaf and then painted.

Other have a mural-type painting on. 

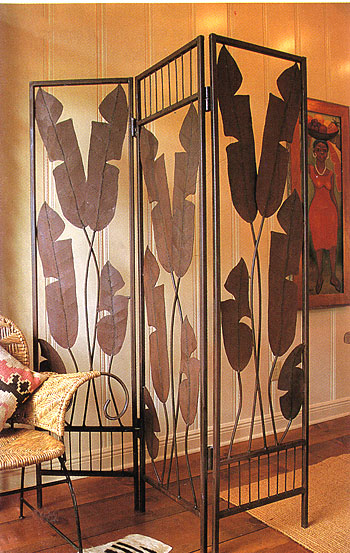
You can create a mood with a delicate filigree Moroccan style:

On Wednesday, I’ll be recovering this mildewed pink taffeta with something much more exciting!

mildewed silk screen before recycling

Watch this space!

Finally: the dining room after Monday, Nov 8 2010 

I love dining on holiday – those long languorous meals, the relaxed settings that make you want to sit and chat for hours….  So I changed my dining room around to get more of that feeling.

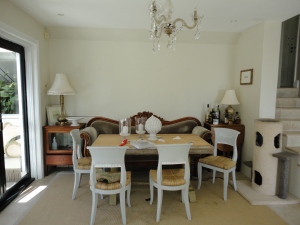
Initially the table had been in the middle of the room, which didn’t work as there are too many passageways that meet in this room: two stairs, the kitchen, the laundry and an outside area all enter this space.

I had studied how we used the room (the secret to the best interiors).  I always sat with a cookery book and a cup of tea.  So I needed a comfy chair.  Then when we had one, the ‘man’ had nowhere to sit.  So we decided to shape the room around how we use it.  
Dining room before

I divided the room into two – a seating area, with a sofa (as I thought that would encourage people to sit and chat) and some chairs to sit and have tea and read cookery books.  There was a lot of work.

I had already redone the chairs and the table (see older posts):
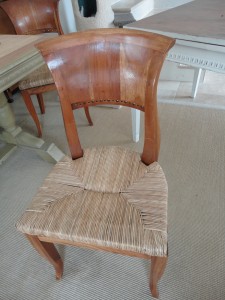
dining chair before recycling

Chair after painting

Dining table before

recycled dining table after

We built the tongue and groove panelling to conceal the door under the house (which was never used) and to create a cosy feel for the dining nook (a while back now for those of you who’ve been following!)
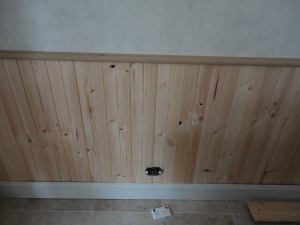
installing tongue and groove panelling

I added a colour wash paint effect to the wall above.  Remember how I stepped in the paint and spilled it everywhere?
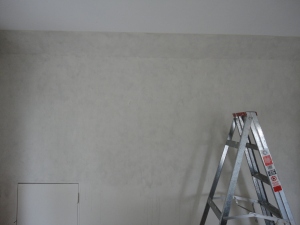
Colourwashed distressed wall

We added tongue and groove down the stairs
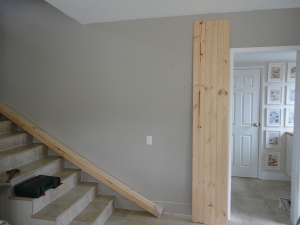
Tongue and groove up the stairs

This was a massive project and it took the two of us a whole (exhausting) weekend.
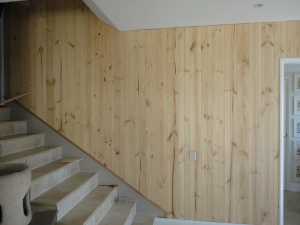
Tongue and grooving the stairs

So a reminder of how it was before – well actually, part way through as the chairs etc are done….
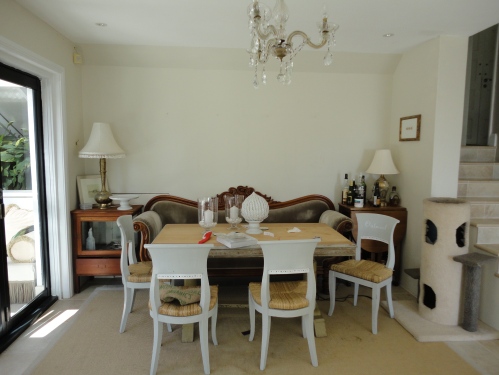
Dining room before

And here it is after – in all its glory.Doesnt cost the earth Dining room after
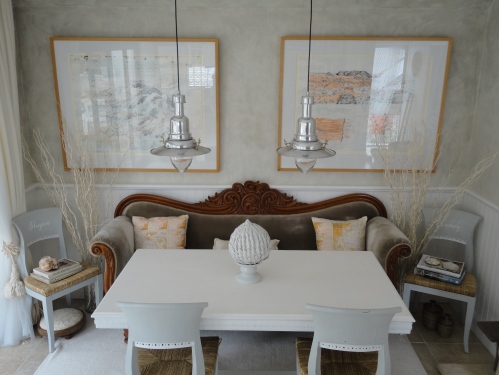
The sofa is an inherited piece (yes – these can be worked into your rooms!) recovered in silk velvet.  I wanted a seating arrangement that would encourage long rowdy meals!  A sofa invites you to stay awhile and chat – so I used this to create a banquette arrangement. I always love sitting in booths in restaurants and this is a little bit like that.

The cushions are World War Two silk escape maps (I have some of these for sale if you would like).  They pick up the casual sketching of the artwork – of the Australian outback.
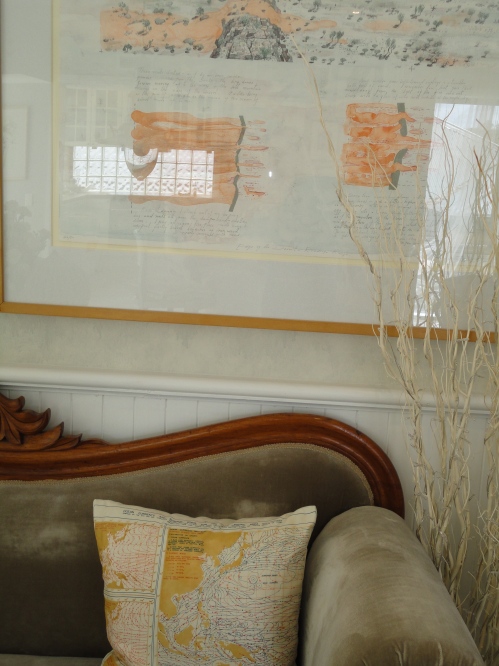
organic recycled dining room after

At either end of the sofa are twig lights – yes – these actually light up!  I’ve shown this further on.  Aren’t they gorgeous?  They help soften the corners of the room, and their organic outline is echoed in both the paintings and the cushions.
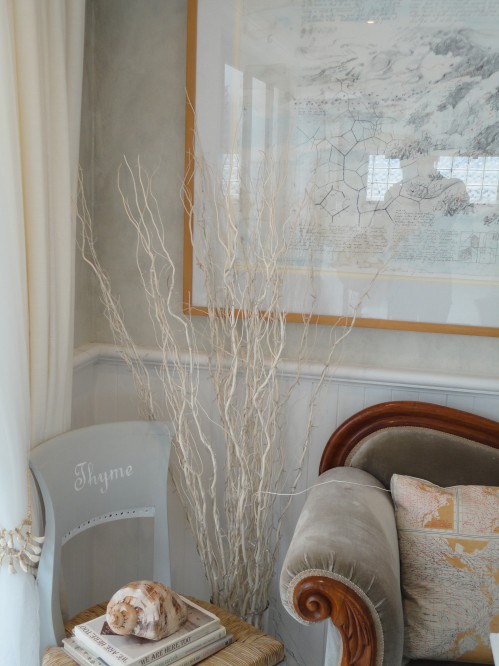
dining room banquette after

The pendant lighting helps to define the area as separate.  I wanted a nautical look and these pendant hurricane lamps are perfect.  Can you believe they are from IKEA?
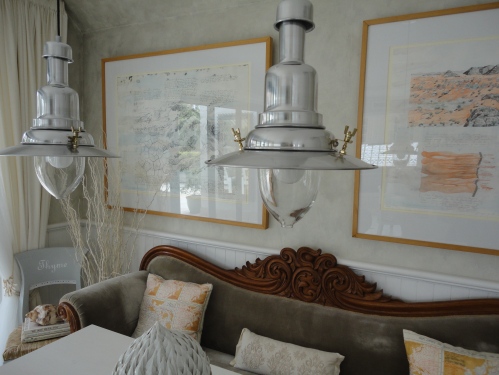
Pendant lighting over banquette dining nook

I chose bulbs at first that were too blue in light (a common problem with eco bulbs).  It’s really worth getting the lighting colour right as it changes an atmosphere immediately.
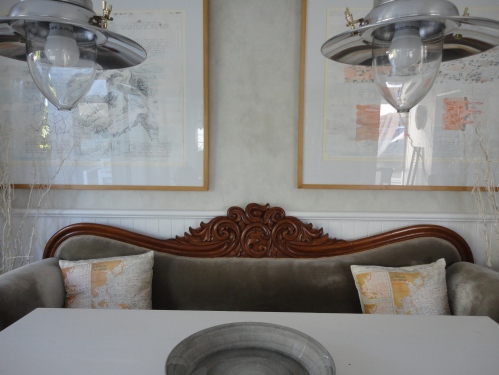
pendant lamp banquette dining

I layered two curtains – but the heavy linen one doesn’t close.  It serves two purposes – one is to create dramatic vertical lines from floor to ceiling to make the room look taller and more elegant.  The second is as a sound baffle to make the acoustics more pleasant.
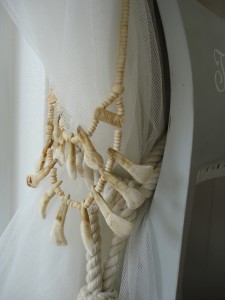
bone necklaces and tassels on muslin curtains

The muslin curtain does close and is caught back with an old bone necklace.
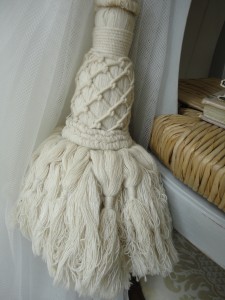
cotton tassel muslin curtain beach chic

A simple cotton tassel pulls the two curtains back together, softening the lines and adding texture.
tongue and groove wall, tortoise shell

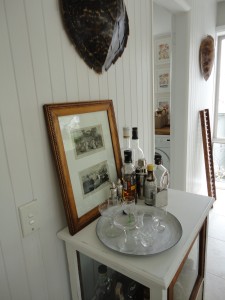
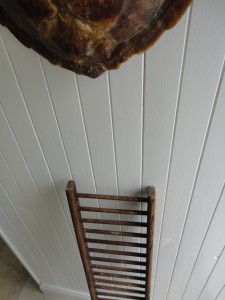
On the new tongue and groove wall, two tortoise shells frame the doorway into the Laundry.  One sits over the newly refurbished drinks cabinet.  The other has an antique miniature ladder running up to it.
tortoise shell

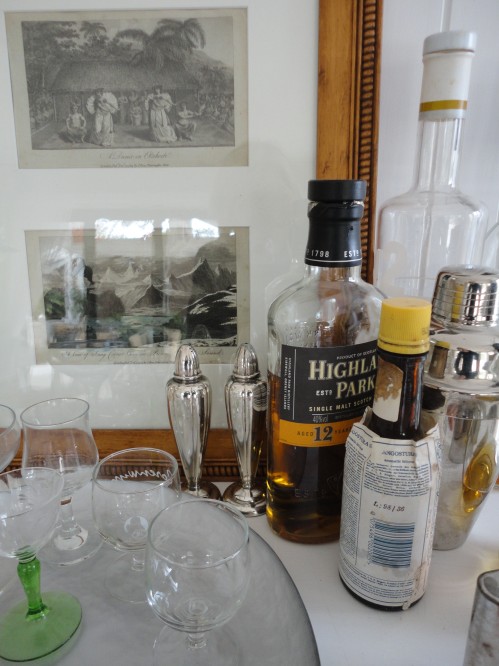
The top of the drinks cabinet entices with antique engravings, a selection of bottles and silver.  Together with the tortoise shells they create a mood of travel, exotic places, beaches and other wonderful conversation topics.
Doesn't cost the earth interiors

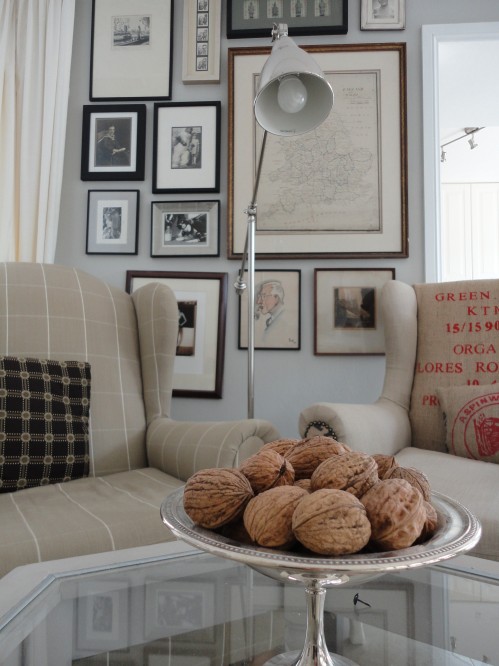
Opposite the banquette dining nook are two armchairs (you can see them recovered in previous posts) and two spare dining chairs.  A lovely spot for a pre-dinner drink or a cup of tea.  I spend time here mulling over what to cook!
recycled interiors chair parisian art

The double hanging curtains add texture and softness to the doors that lead out to the terrace.
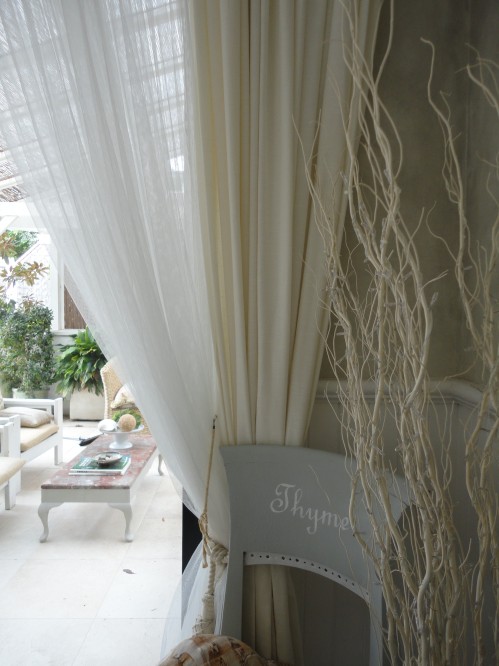
muslin and linen curtains texture

For dinner parties you can really create an atmosphere with lighting.  The twig lights immediately create a party with their fairy light frivolity.
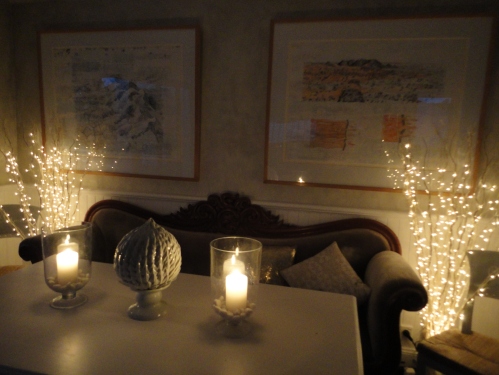
romantic lighting schemes dining

On the banquette sofa you are surrounded by the soft glow of fairy lights – it feels quite magical!  The colour wash effect helps create a feeling of age and character in this modern house.
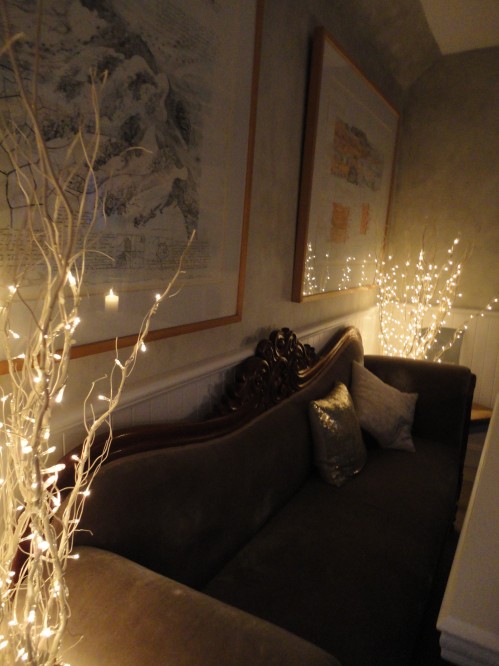
mood lighting for dining

It’s been a huge amount of work – but really worth it.  The most important part of the whole process was having a complete vision of the final product all the way through, so that all decisions and changes led to a cohesive look.
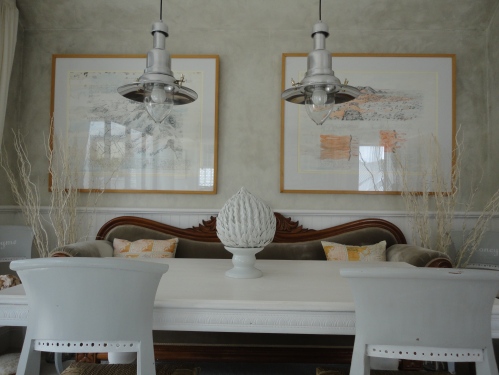
Banquette dining after

Have you been inspired by holiday to change a room?

Finally the chair! Before and after…. Wednesday, Oct 6 2010 

This chair as already been the subject of much debate.  For some reason I have been more indecisive about this than almost anything!  Firstly a confession – it’s from an old-people’s home.  That really puts me off it.  Doesn’t it you?  Maybe that contributed to my indecision.

doesnt cost the earth chair before

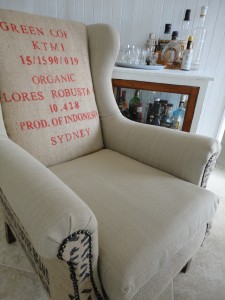
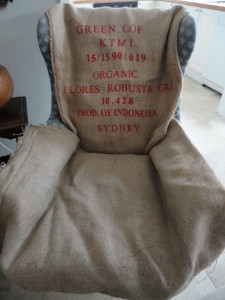
This was the photo (below) that inspired me.  But not having any french grain sacks to hand, and not having large sums of money to purchase these now highly desirable items, I found a way that doesn’t cost the earth.  Coffee sacks!  And as you unanimously advised, I combined these with Ralph Lauren linen.

recycled french grain sack chair

Firstly I stripped the chair back.  It’s amazing how much the fabric had faded over time.  But the structure was still sound (phew!).

Stripping the chair back

When redoing an armchair you start from the inside out (and the outside covers up all your messy workings).  So the first job is the bit under the cushion, for which I used the back of a coffee sack.  You can see that I already had a very helpful assistant.

My assistant (cat on sacks)

I covered the inside arms with the Ralph Lauren linen – this is just gorgeous heavy-weight fabric.  It’s usually hellish expensive and if you were to cover the entire chair in it, you’d need 5-6 metres.  But because I was combining this with sacks, I used just two.  Don’t you love a bargain?

Recovering the inner arm

Then I started on the inside wings – lots of curves mean you have to pull the fabric very tight, use lots of staples, and snip into the curves to ease the fabric round (without cutting the wrong bit…)

Recovering the chair - half way through

I was worried about not seeing any coffee sack from the front, so I used one to cover the inside back.  it’s contrasting nicely with the linen I think.  The seat cushion isn’t covered yet, but Porridge (cat) is testing it for comfort and (I think) giving it her approval.

Cat trying out the chair for size

I decided to use the coffee sacks mainly on the outside.  This doesn’t take any wear and tear – it isn’t sat on or leaned on – so doesn’t need to be either smooth to the touch or very tough (although I assume these sacks are pretty tough).  They aren’t rough to touch, but they aren’t as silky as the linen feels.

Chair covered in coffee sacks

The seat cushion was a total b**tard actually – I had to sew it twice before it fitted properly – the corners kept not aligning.  I measured it really carefully so I have no idea what happened.  Anyway, I got there eventually.  Please note at this stage what I call the ‘old lady’ legs.  The legs of this chair really bothered me.  Like those American Tan tights that make legs (my legs not chair legs!) look frumpy, these legs kind of look old-people’s-home to me.  I considered cutting them off and replacing them but I was worried about the structural integrity of the chair.

Cat on coffee sack chair

I finished off the arms ends with some lovely printed sacks and pondered the legs.  I was also indecisive about using the nailhead trim but an overwhelming vote (thank you!) meant that 100% of you thought I should.  Porridge realised immediately that the new colour scheme of the chair sets off her fur beautifully.

I decided to cover the legs with a dark stain – almost black.  The difference that small change made is amazing.  Here is the finished product in all her (I think it’s a her) glory….

Coffee sack chair after

It was so easy to hand over the decision that I am seriously considering polling all major life decision this way.  How much easier to have web votes on which job to take, where to live and so on!

Recycled chair with coffee sacks

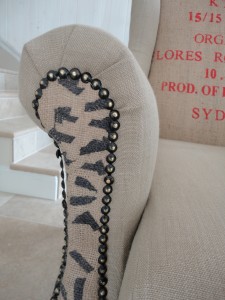
I love the nail-head trim round the arm.  The old chair was piped around the edge, which I think looks dated, so I pleated the fabric over the end of the arm and added an end piece.  The fabric on the end of the arms has printed writing running vertically, but it looks kind of like leopard skin.  Funky!

Coffee sack chair with dark legs

You can really see here the difference in texture between the linen and the sacks.  I love her smart dark legs.  So much better than American Tan (if you’re still wearing those tights, stop right now and wear fishnets or black instead!).

Coffee sack chair with grain sack cushion

She even looks beautiful with one of my grain sack cushions on…   (wombats rule – they are such cute, chubby creatures)

I used a different sack for the back (if I’d had another black one I would have used that, but I couldn’t face an hour’s drive to get another one). 

Back of coffee sack chair

Just a reminder of what it looked like before?

doesnt cost the earth chair before

And what it looks like now…

Vintage recycled grain sack chair after

I’m very happy with how she turned out.  And for the price of 2m of fabric.

The cats wanted a final pose too…

Cats on coffee sack chair

What do you think?  Does it still look like it’s from an old people’s home??

Please can you vote on the chair trim? Tuesday, Sep 28 2010 

Thanks for all the advice on the chair.  I took it.  And am nearly finished (you can’t see it yet).

I’ve used both the Ralph Lauren linen and the coffee sacks as you all unanimously advised.  And now I’m in a dilemma about the trim….

Where the two fabrics meet are they better left unadorned, or do they look smarter with an antique nail-head trim?  I was sure the trim was going to be the finishing touch, but now I’m not so sure.  I have no idea why I’m so indecisive about this chair!

Recycled grain sack chair without trim

It looks simple without the trim and kind of rustic.  One fabric blends into the next.  Or does it just look unfinished?

Grain sack chair with trim

The trim really neatens it all up, and has a lovely aged character, but…  Is the trim all too much?

A little cabinet: before and after Monday, Sep 13 2010 

Recycled cedar cabinet before

I found this little cedar cabinet at auction and thought it would be useful….  But I’m never that keen on wood that is so strongly coloured.  Cedar is SO red that it can be very dominant in any room, so I thought about toning it down.

Initially I was considering covering the whole piece with silver leaf.  But then I had a play with the leaf, and decided that it would look too shiny.  So I decided to use the silver leaf on the panels and paint the rest white.

Cabinet half way through

I was very careful to mask off all the glass.  As I was painting, I got to the door, and I loved the hinges and the little brass keyhole so much that I thought I’d preserve some of the original wood, and those features.  So I didn’t paint the door.

silver leaf drawer

Silver leafing the panels was another matter.  This was my first attempt on the drawer and I ended up taking it all off and starting again as you can see the left hand side looks rough.  That’s because I put the leaf on when the ‘size’ (special glue to stick down leaf) was still too wet.  I’m telling you this, as taking it off took abuot 3 times as long as putting it on….  Patience is definitely a worthwhile virtue.   So I was more patient next time, and worried less about it drying before I’d got the leaf on, and it went on much more smoothly.

I didn’t want the new and shiny look, so I experimented with raw umber and paynes grey oil colour.  In the end, I put two coats of semi gloss varnish on, to preserve the leaf.  I then rubbed a little undiluted oil colour on, using a soft cloth, until it was the thinned glaze.  I just put it in patches so that it took down the silver newness a notch or two. 

Cabinet after

I gave my lovely paint finish a good hard sand to rough up the edges – fragments of the cedar showing through emphasise its outline and also pick up the untouched door.  Plus I wanted to have a worn and warm look, to reflect its true age.

Antiqued silver leaf panel

You can see below the keyhole I was so keen to preserve – plus you can see that I really did sand it back hard.

Charming keyhole

I really like the patination effect from rubbing the oil colour over.  Raw Umber is brilliant for aging anything.  Except ‘the man’ – I suspect I do a pretty good job at aging him all by myself…

silver leaf

This makes such a perfect drinks cabinet – as you can see all the beautiful bottles and labels.  I had been thinking of using it in my study, but you don’t really want to look at files. 

Silver leaf cabinet after

All that’s missing is a handle for the drawer.  My favourite shop (that really was called Knobs and Knockers) has shut down!  So I’m on the hunt for the right one.  It may take some time but I’ll be sure to show you when it’s done!

I need your opinion…. Friday, Sep 3 2010 

recycled french grain sack chair

You know when you’re going out and you can’t decide which shoes to wear?  So you put one of each on each foot and hobble lop-sidedly along and ask your husband/friend/boyfriend/sister/mother for their advice?  Well – this is just the same.  I need your opinion….

I’ve been coveting these grain sack chairs.  Elegant, rustic, interesting and recycled.  Yum!

And I’ve now acquired a pair of chairs and am thinking about options to redo them.  Here is one of them ‘before’:

doesnt cost the earth chair before

They are identical.  I don’t have any grain sacks, so instead, I want to use the coffee sacks (recycled) that I used on the bench (see previous post https://doesntcosttheearth.wordpress.com/2010/07/28/organic-recycled-end-of-bed-bench/).  I love the texture, the casual funky look, the print.  But I can’t decide how much of this to use and whether or not to combine it with a more conventional fabric, such as linen, as well.  So here are some options I’m considering – what do you think?

sacks on chair

You have to imagine it all tight and upholstered, not all baggy…  Is this all ‘de trop’ with all the red circles?   Is it better with only one bit of pattern?

recycled sacks on chair

Is the red too much on a chair (I made it into a cushion on this post https://doesntcosttheearth.wordpress.com/2010/08/16/grain-sack-pillows-that-dont-cost-the-earth/), and is it better with no pattern just writing?

doesnt cost the earth chair with sacks

Or is it better with lots of different writing?

Lots of writing on sacks

Or even more different colours etc, but symmetrical

recycled sack chair

Just to throw one more thing into the mix, I have a roll of beautiful Ralph Lauren upholstery linen, which goes beautifully with these hessian sacks.  So I can also do a combination of linen and sacks…

(do you get why I can’t make my mind up now??!!)

linen upholstery

And this linen is (understandably) smoother and nice to sit on with bare arms or legs (which, this being Australia) is likely.

So, should I combine the two?  And if so, should I put linen on the inside, that you sit against, and just have the sacks on the outside (which I can’t show you as it’s too hard to mock-up).  Or does that miss the point?

And if I’m going to have parts that are plain – should I use plain hessian sack or the plain linen?

can't decide!!

Can you believe that I actually don’t even drink coffee?  I love tea – but I don’t think tea sacks exist.

What do you think?  What should I do?  All comments and suggestions gratefully received!

Next Page »